Thursday, October 27, 2011

Putu Mayam or Iddiappam or String Hoppers


Its still not too late to wish all my Indian friends Happy Deepavali. Diwali or Deepavali popularly known as the "festival of lights," is a festival celebrated between mid-October and mid-November for different reasons. For Hindus, Diwali is one of the most important festivals of the year and is celebrated in families by performing traditional activities together in their homes. In Malaysia, Deepavali is another important celebration. Growing up in a country of multi-races, I have fond memories of Deepavali too. I remember when I was small, we went to our neighbours house for Deepavali and was served Putu Mayam with Chicken Curry and was surprised coz the only way I know of eating it, is with brown sugar and freshly grated coconut. Lol..how pathetic. But today, Putu Mayam and chicken curry is no longer a rare sight on our dining table.
Being away from home, not that we celebrate Deepavali but just to add some cheerful mood for the day or to make it sound grandeur in the kitchen, I made Putu Mayam and chicken curry for dinner.

Putu Mayam or most commonly known as idiyappam or string hoppers is a dish from Southern India. Being married to one, I was taught by MIL to make them. It is made of rice flour, salt and water. It is generally served as the main course at breakfast or dinner together with curry (potato, egg, fish or meat curry) and coconut chutney. It is not usually served at lunch.

Here's how to make it:-
Ingredients:-

500 gm rice flour
1tsp salt
600ml boiling water

Method:
1. Mix flour and salt in a bowl.
2. Add the boiling water and by using a wooden spatula combine all ingredients to make a soft dough.
3. Put the dough into the pressing mould and press the dough into a round shape on a bamboo rack and steam for7-10 minutes depending on the size. Repeat till finish.

Serve with your favorite curry or like me, I simply enjoy eating them with fresly grated coconut and brown sugar.

Monday, October 24, 2011

I'm back with ............Marvelous Marble Cake


Assalamualaikum and Greetings to all my fellow readers
Yes, it's been more than a year since my last entry. Lol.......no explanation on my part or shall I say I was hybernating. Well, since I owe family members and friends a lot of recipe and becoming forgetful of late. I better start putting my entries again for my loved ones future reference.
Otherwise, Alhamdulillah, I am all fine and healthy and so busy with my role as the Manager of Home Affairs.

Anyway, long story short, I went home last week and was so lucky to have a friend baked me her marble cake or shall I say marbleous cake. It was really the taste I was expecting when I ate them. Yes, I love to bake but usually doesnt eat them and there's only a few cake that I like. Was so happy that I got to share her marbleous cake with my family and she did bake another one for me to bring back to HK so that I could share it with my PA and my other half, unfortunately didnt have time to pick it up at her house.......sigh.......takde rezki la tu. But I told her to keep the cake in the freezer for me till I return next...lol!!

Left KL very early morning and got home around 3 in the afternoon and didnt sleep at all the nite before. Feeling so exhausted as I reached home but somehow couldnt go to sleep and feeling restless. Hb wasnt home when I arrived and thought of making something sweet for tea. Jump off from the sofa and head straight to the kitchen. Yes, it was the marble cake I made using half of the ingredients from my friend's original recipe.
Unfortunately, I didnt have few ingredients i.e. ovalette and choc. emulco but that doesnt dampen my spirit to bake. A quick call to my baking sifu friend and voilla................done!! Thanks again Ana for sharing your recipe. God bless you my fren.
The cake turned out allright and tasted good but it wasnt light and fluffy as Ana made coz I did not have the ovalette. Went to few supermarkets here yesterday and looking for ovalette but couldnt find any on the shelf. Perhaps, I have to go to the special bakery store to find them here or otherwise wait for my PIC who will be coming soon from KL and bring me some.


Trust me it is so easy to make this cake and I simply luv it!! The tip here is to use good quality butter. Here's the recipe

Ingredients:
250gm butter (I use Lurpark unsalted butter) at room temperature
150 gm caster sugar
3 whole eggs
1 egg yolk
1 tsp essence vanilla
1 tsp ovalette (I didnt use at all)
2 tbsp condensed milk
175gm plain flour
1 tsp baking powder
1/2 tsp salt
1 tbsp cocoa powder
1 tsp chocolate emulco (optional, I didnt use either as I dont have any)

Method:-
1. Sieve together flour, salt and baking powder. Set aside.
2. In a mixer, combine butter, sugar, eggs, ovalette, condensed milk and essence vanilla. Beat until well mix for 10 minutes.
3. Add in the flour mixture and mix until fully incorporated.
4. Divide batter into 2 portion. Add chocolate emulco and cocoa powder into half of the batter.
5. Grease and flour pan or line with baking paper. I use 9 x 4 inch rectangular mould.
6. Scoop the batter alternating between plain and cocoa mixture. Repeat till finish.
7. Bake in a preheated oven 150C for 1 hour 10 minutes.

On the same day, half gone and when my other half complimented saying the cake was nice.........mak ai...akak senyum sampai ke telinga you!! Selamat mencuba.

Thursday, July 1, 2010

Green Tea Brulee


Ingredients

Fresh Cream 250 ml
Fresh Milk 60 ml
Egg yolk 3
Sugar 35 gm
Honey 5 gm (1 teaspoon)
Green Tea Powder 3 gm (1 tablespoon)
Hot water 1 tablespoon

Method

1. Mix green tea powder with hot water and make a paste.
2. Put fresh cream and milk in a pan and warm it to 50 degrees C. Do not bring to boil.
3. In a bowl, put egg yolk, sugar, honey and green tea paste and mix well.
4. Add the egg mixture into the cream and milk pan and mix well.
5. Strain the mixture into souffle cups and bake (using bath bake method) for 15 minutes in oven temperature 150 degrees.
6. Cool in a refrigerator and leave to set.

Monday, June 7, 2010

Macarons


I never grew up knowing macarons. Mother never made or buy them. Its only after I have started working and could enjoy high tea with friends at the hotel, I knew of the existence of macarons and always loved them especially if it comes on the cakes.
I was so happy and fortunate that I got to learn to make this myself plus the kids like it too. Its quite expensive to buy it from the store if I want to buy a lot for a party, it leaves a dent on my pocket...hahahahaha.

Macarons

Ingredients

For meringue
90 gm egg white
90 gm granulated sugar
90 gm icing sugar
105 gm almond powder (almond meal)
Few drops of red colouring

For Filling

60gm fresh cream
150gm white chocolate
1 1/2 teaspoon strawberry powder or 1/3 teaspoon strawberry essence


Method:

1. Sieve icing sugar and almond powder in a bowl. Do this twice.
2. Beat egg white till foamy and add half sugar and beat till soft peaks form.
3. Add the balance of sugar and continue to beat until stiff.
4. Fold in the sieved sugar and almond powder to the egg mixture and mix well.
5. Add the red colouring and fold the mixture gently until combine.
6. Put dough in a piping bag with a 2 cm plain tube. Pipe a 4 cm round and 2cm apart onto a baking tray that have been lined with greased paper.
7. Tap the tray gently so that the mixture spread nicely and leave it to stand for 20 minutes or longer until it becomes dry and when you touch them it will not dirty your finger.
8. Bake in a preheated oven 140C for 15-20 minutes. Let it cool on the baking tray.


For filling:-

1. In a saucepan heat the fresh cream until boil and remove from heat. Add the chopped white chocolate. Stir until smooth. Add the strawberry flavouring.
2. Keep the mixture in the refrigerator until cool or until mixture is spreadable.
3. Put mixture in a piping bag and pipe it onto the macarons and sandwich them.

Note: you can divide the meringue mixture into 3 parts and add colouring as you like. Do the same for the filling and just add other flavouring i.e. mango, lemon, coffee or simply plain. You will definitely enjoy the arrays of coloured macarons on the table as I did.
You can also sprinkle cocoa powder, instant coffee, chopped chocolate on the meringue mixture after piping them to give your meringue a more appealing look or just leave it plain.

Saturday, May 22, 2010

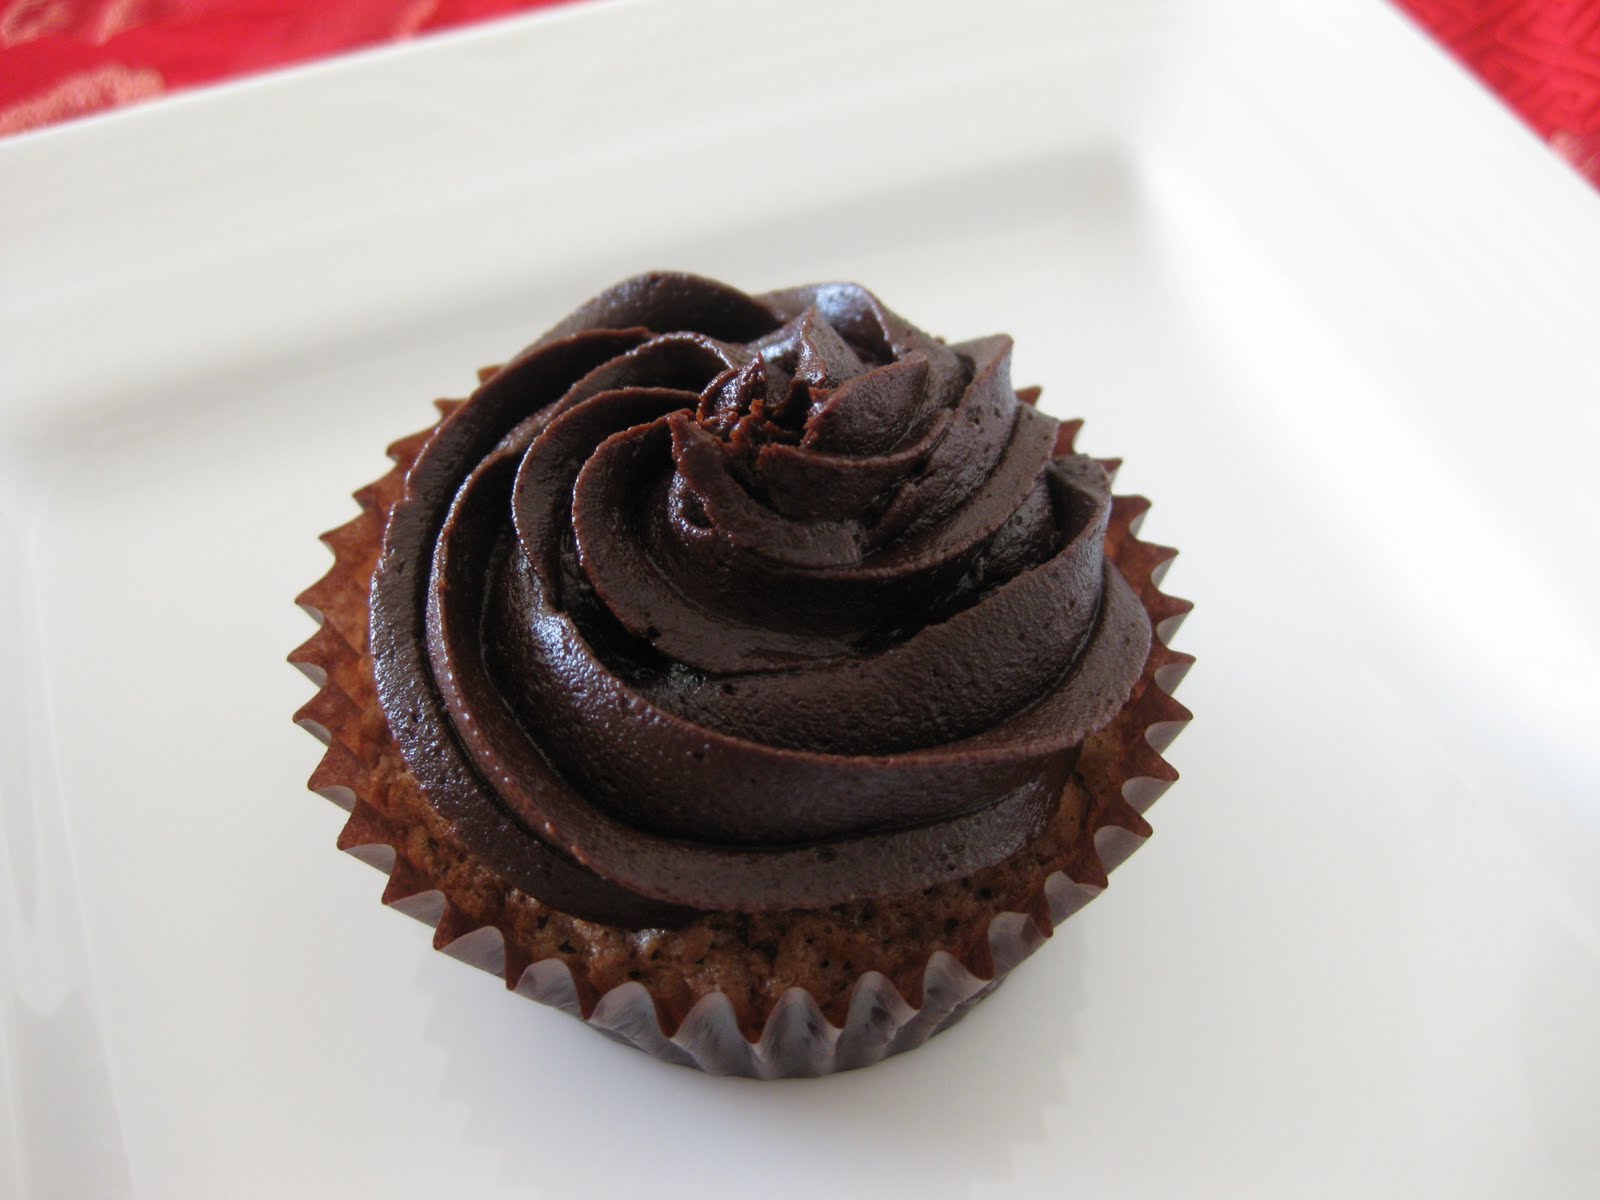
Chocolate Cupcake


It was a day off from school for the kids last Thursday. My initial plan was to take them to Disneyland but weather forecast doesnt look good showing sign of scattered thunderstorm and it was raining the morning bit. Felt sorry for the kids as later part it turn out to be such a beautiful day and it would have been lovely to spend the day outdoor. Since there was a changed in plan, I called one of their friends to invite her over but sad she has got lessons to attend. Sigh........what next?? Kids were getting restless and bored and to make it worst, I decided to cook Malay Dish for lunch that day.......hahahahaha once in a while they have to follow my taste bud as well. Of course, when I mentioned its going to be Asam Pedas Ikan (Fish in Spicy Sour Soup) they gave me that boring look...but I'm determined this time, they have to eat whats on the table... (do I sound like a step mother...hahahaha) At the end was so happy to see them enjoying the dish and they said "hmmm will have this dish again". Yes, mission accomplished...lols!!

To keep my princesses entertained, I agreed to make cupcakes for them as a treat that day for tea time and thus we got invitation to have dinner at a friend's later. It would be nice to bring something too. There we go....baking time again and all of us had fun baking together and messing up the kitchen.

Here's the recipe:-

150 gm butter
300 gm castor sugar
3 eggs
350 gm plain flour
1 teaspoon bicarbonate soda
1/2 teaspoon salt
340 gm cooking chocolate or chocolate chips
350 ml water
2 teaspoon vanilla essence

Method:

1. Sieve flour, bicarbonate soda and salt together into a bowl and set aside.
2. Using double boil method, melt butter and cooking chocolate until chocolate completely melted. (you can also put in the microwave).
3. Pour the melted mixture and add sugar. Beat until well blended.
4. Add egg one at a time.
5. Add the vanilla essence.
6. Take 1/3 of the sieved flour and fold into mixture. Repeat until finish.
7. Add 1/3 of the water into flour mixture and mix until smooth. Repeat until finish.
8. Pour mixture into cup cakes mould and bake in a preheated oven 170C for 20 minutes or until cake tester inserted comes out clean.
9. Let cool and spread with Chocolate Butter Cream Icing.


Chocolate Butter Cream Icing

Ingredients

200 gm butter
3 cups icing sugar
1/2 cup cocoa powder
1 teaspoon vanilla essence
3 tablespoon milk

Method:

1. Cream butter till smooth.
2. Add icing sugar and beat well.
3. Add vanilla essence, milk and mix.
4. Add cocoa powder and beat until well blended.
5. Put in a piping bag and pipe it onto the cake or spread it with spatula and add sprinkles.

I used Valrhona Cocoa Powder this time and it does give that smooth chocolaty taste....luv it!!

Happy Baking!!

Tuesday, May 18, 2010

Sugee Cake


This is one of my favorite cake. I was very lucky as my ex boss's wife used to make them for me as she knows I really love them. I used to order this cake from a lady in KL or buy them from a cake shop in Bangsar. Never once I tried baking them. I dont know where this recipe came from but I believe it must be from my ex boss's wife as it was written on a piece of paper and I had them for years.

Since I have to bake a cake for my finale lesson at Wilton, i thot of giving this one a try. The original recipe makes a bigger cake and since I dont have a big mould, I have to make a smaller one and halved off all the ingredients.

Ingredients:-

(A)
125 gm butter
130 gm suji (semolina)

(B)
125 gm butter
160 gm sugar

6 egg yolks
4 egg whites
40 gm castor sugar
1 tsp vanilla essence
100 gm plain flour }
1 gm baking powder } sieve together
65 gm ground almonds }

Method:

1. Line a 8 inch round cake tin with greased baking paper.
2. Beat butter (A) till light and fluffy. Add the semolina and mix well. Leave the mixture to stand for 30 minutes or longer.
3. Cream butter and sugar till light and fluffy.
4. Add yolk one at a time and mix well.
5. Add the essence vanilla and add the suji mixture and mix until everything combines.
6. Beat egg whites till foamy and add sugar. Beat till stiff.
7. Fold the egg white mixture to suji mixture.
8. Add the sieved flour, baking powder and ground almonds to the suji mixture. Fold gently until combine.
9. Bake in a preheated oven 170C and bake for 55 minutes.


The verdict from a friend and my better half..........lovely!! Happy trying and leave a comment.

Saturday, May 15, 2010

Raisins/Orange Peel Cake


I recently signed up to do a Fondant and Gum Paste course here. I finished my Course 1, 2 and 3 in the Land of the Rising Sun. Since this is the final course offered by Wilton, I thought I might as well do it and be done since I love spending time baking and also to perfect my decorating skills. Didnt realise that the arrangements and things provided by the school differs from each country. In Nippon we were provided with the real cakes or the dummy cakes but here we have to bring our own.
With a very short notice to prepare for my 2nd lesson which falls on the next day, I didnt want to let my disappointment dampened my learning spirits. Wanted to try making sugee cake but sad that I dont have the ingredients in my kitchen and it was too late to rush to the supermarket. Wanted to make dark chocolate cake...didnt have cocoa powder at home....sigh.
What I found in stock was some raisins and orange peel. I actually bought the dried orange peel to make my orange bread. What am I to make.....aaarghhhhhhhh. Lucky, mother taught me how to make steam mix fruit cake before. I used the same method accept no mix fruits and orange sunquick this time.

Woke up early that day and manage to make a cake. What shall I call this ..... Steam Raisins/Orange Peel Cake?? Thank God, it turned out okay considering it was made in a haste and with whatever little ingredients I had at home. Brought my cake and was only taught to lay the fondant on it and I just topped it with the 2 carnations I made the day before during my 1st lesson. Blind me...........cant tell how disappointed I was that day!! Was expecting to be able to deco the cake better but no appropriate tools was provided. But anyway.....on the bright side, yes another cake for the family and my other half just love it.


My Raisin Cake, the original look before the covering fondant, dont know why I cant rotate this picture...

Here's the recipe

Ingredients:-
300 gm caster sugar
300 gm plain flour
3 large eggs
180 gm butter
250 gm mixed dried fruits ( i used raisins and orange peel)
1 tsp bicarbonate soda
1 tsp vanilla essence
1 cup water

Method

1. Heat pan and add 150 gram sugar and let it caramelised. Once sugar turn brown add water and let it boil until the caramelised sugar become syrup. Remove from pan and let cool.
2. In a bowl, sieve flour and add the dried fruits. Put aside.
3. Beat egg white and bicarbonate soda until foamy. Add the balance of 150 gm sugar and beat till stiff. Add yolk one at a time. Mix well.
4. In another bowl, cream butter till light and add the egg mixture mixing well.
5. Add the vanilla essence.
6. Add the flour mixture and using cutting motion mix ingredients well.
7. Last, add the sugar syrup and fold in the mixture.
8. Pour in a round 8 inch mould that has already been lined with baking paper. Cover with foil and steam for 2 hours in a preheated steamer.